Tuesday, May 31, 2011
Studio Makeover: Week Two
Monday, July 14, 2008
Found!

Last week when I was in a funk I made myself go down to the studio and make the room a little bit nicer. Here is the results...
My four lil' dudes from A. Bel Studio. They are magnets but I stuck them up on the wall with foam tape. You can too if you just buy the cake toppers from their supply shop.
Meet KRAZY! He is my new studio mate! I got him at the Crafty Bastard show last month! I LOVE HIM! We were setting up for the show when I heard Sloane from Sloane's Creations (Norfolk Craft Mafia) say that this is what she does with all the leftover tissue paper. I looked over and she was holding my bird! I feel in love!KRAZY is a homegrown organic swan gourd that is decorated with hand-painted recycled tissue paper. Isn't he the best?

On the left are Aidan's "Magorians". I have no idea where he comes up with this stuff. They have an entire story line. Amazing. On the right are sweet treetop owls from Erica! What a sweet little gift from my arty fartsy friend!

Thursday, January 31, 2008
Studio Makeover: Breathing room

I finally cleaned out the other corner of the bathroom and hung up my UFP's. Now I have no need for the rack in the main room. That has made a great difference, I love having the extra room.

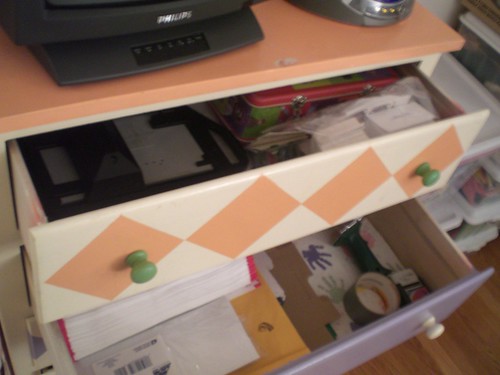
My MIL gave me these red serving dishes. I was really grateful for them but storing them between parties was going to be a challenge, until I realized how great they would be in the drawer. This eliminated a bunch of jars and bins that I have on the desk! Again more room to breath. LOVE that!
Wednesday, January 23, 2008
Studio Makeover: LINKY LUV
De-clutter Tools :
Container store
Ikea

Organized living
Blogs:
Domestic Diva
Clutter-cubed
Sew organized
Ikea hacker
Flickr Inspiration:
Operation: Sewing Room Organization
My Crafting Room
Craft Rooms
Organization is for squares
Sewing Rooms
Art Studio Makeover
Scrap Spaces & Beyond
Sewing Tool and Accessories
As always I want your help adding to the link lists, leave us a comment with your favorite organization tips, tools and LINKS!
Monday, January 21, 2008
Studio Makeover: Cutting Carousel
I could not figure out what to do with this. Once in my studio it was big and overwhelming. But then I got inspired to create a "cutting carousel". Now everything I need to cut is in one place. And best of all I can simply move it from the studio to the "cutting counter" in the kitchen.
Now I have no going back and forth gathering up this and that. And clean up is a snap. It all lives in one handy carousel.
I believe they are still in the stores but if not I found them on line at Kaboodle's. Happy organizing!
Sunday, January 20, 2008
Studio Makeover: Ribbons and whatnot!

My ribbon solution is not nearly exciting enough but it was free. Because the others solutions are just so tasty! I got this idea from the creative Mary Ellen from Twist Style. ME made it look much better, she has more ribbon than me! I have to shop soon. I saw her studio shots over at flickr and said "hey I have one of those racks in my attic"! Some day when I stop moving furniture around I will do one of these other ideas, I can't put up shelves if I keep my stuff in one place. I am a nomad at heart.
Note that the top two shelves on my rack hold gift and merchandise bags, along with tissue paper. This makes for quick and easy wrapping for a gift or sale. I should integrate these into the shipping and handling cabinet but I have to have more ribbon first! I can't have an empty shelve, that is just WRONG.

Check this out! WOW, right. Monica from Happy Zombie calls these her shelves of joy. I say she's got that right! For more photos of her fantastic studio check out her flickr shots. Big thanks to Monica for letting me share these photos. You are just swell.

I did not realize that my inspiration for my ironing center came from this photo. Monica how do you add the subliminal messages? Again my version is not nearly as dreamy! But it was all from found objects that were in my home somewhere. (so far I have spent only 10.00)

So here are a few other "good things" you can do with your ribbon. Inspiration is a great thing!

Martha has this in her Basement...A set of slim metal cafe-curtain rods, attached to wooden shelf brackets, holds a colorful assortment of ribbons and twines. The rods are removable, so spools can be easily replaced

Marta says...To keep ribbons organized, build storage racks from copper gutters. Have a lumberyard cut a half-round gutter and cap the ends. Punch holes along top edge; mount in a dry place away from sunlight to keep ribbons from fading.
I saw photo above over at the Domestic Diva Blog she has the complete guide to ribbon organization. AND much, much more. She has a six part series on Sewing Room Organization. DAMN its good! This girl has it all.
Now go and clean your room! ; )
xoxox, Kelly

Update: Look what I found, LOVE IT! The Ribbon and Wrap Organizer is what I want on the back of that door! this if perfect. Oh honey that birthday is coming up soon! It is the big 4 0 too!
Friday, January 18, 2008
Studio Makeover: Sewing table
I am getting there that is for sure, last week it looked like the photo below. Yikes!
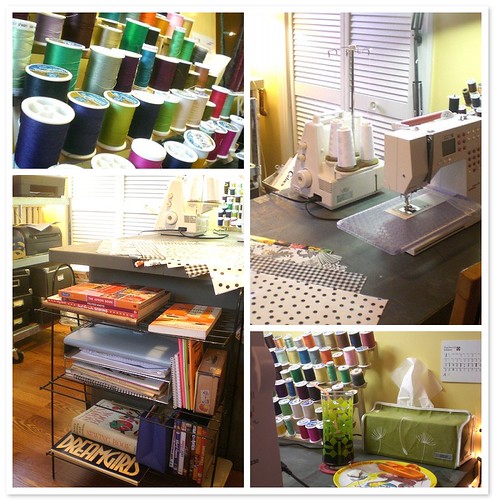
What I love this that there so very little on the desk. I am using the kids old plate from their toddler days for all the pins and snips. I will be putting the tread up on the wall this weekend. I would like to add shelves too.
I am in love with my little fifties wire shelves. It think my MIL bought it for me years and years ago. They hold my studio movies, the movies that I can plug my self into and not really miss any thing because I know them so well. I also took the books off the fabric shelves so that I can use that space better. Soon, soon!

Have great weekend all you peoples,
X0X0X0, Kelly
Thursday, January 17, 2008
Studio Makeover: shipping and handling REVISIT!
If you are selling and shipping I highly recommend doing this for yourself. My Friend Beth has a shipping drawer. I was thinking the other day you could take vintage suitcase and make a shipping center out of that. You may need to hot glue in some added pockets but that would store nicely and look good anywhere. I like it! I want to make one just for fun!

Wednesday, January 16, 2008
Studio Makeover: Paper work
When you are running your own little shop you are surrounded by paper. What do you do with all those orders, the shopping lists and the endless to do list? Well you head over to Suzanne's site Let's talk organizing and see what your organizational solution is. Personally I am a visual person through and through, if I put a list in a notebook you can bet I will NEVER EVER look at it again. So dry erase board and 4 clip boards to the rescue.I use the magnetic dry erase board for notes to self and what I need to do right away! It is my in-my-face-can-not-forget spot.
As for the clip boards I got that idea from Ace of Cakes, they have an entire wall of clip boards that they use for orders. I had to do this. I rounded up the stray clip boards that we already had, yes we actually have 5, who knew? We used to have them for the kids to color with in the car. Any who, I took them out back and spray painted them all one color so make them pretty.
What are they for you ask? Etsy orders, shopping list, Weekly To Do list, and Craft show info.
The shopping list has 3 columns one for local fabric stores, one for oilcloth orders, and the other for I wish I had items. I am constantly forgetting what I am running low on so I use this sheet to right it down right away. The craft show clip board is for the applications and for the show details, no more looking through piles of paper looking for where I am supposed to park or what size my booth is.
Thanks so much to all those that have been so nice in the comments. You all are right, I don't have a big budget in fact I have no budget. I like using what I have. It just makes sense. Plus my stuff is cuter that the typical org stuff. I love going to the attic or shed and looking around to find something that could be used for a new purpose. So come back soon there is much more to come!
Later that night.... Hi again I am down in the cave tonight trying to focus on getting this clutter off my sewing table. I just had the best thought what if I had a budget. Sweet Dreaming! Here is the fantasy workroom that I wrote for my RCM profile.
Now I have given my fantasy space a whole lot of thought! I would fill the room with 1950's metal cabinets painted lipstick red. There would be so many drawers that I would have empty ones for at least a year. I would have Boomerang Formica surfaces with the chrome edges.
There would be French doors looking out onto a garden patio. On the patio there would be electrical outlets and a great big table so I could sew out there on nice days. There would be a wall of shelves for fabric and a wall of windows for light. Instead of ironing boards I would have a pressing table, just like they had in the costume shop at Theatre Virginia. I would have a cutting table with the same metal cabinet underneath. Yep lots of drawer there too. I would have place set up just for wrapping, tagging and shipping, all the supplies on hand. A perminate place to take photos would be totally dreamy. It would save so much time to be able to just have it all set up, organized ready to go.
Tuesday, January 15, 2008
Studio makeover: hang ups
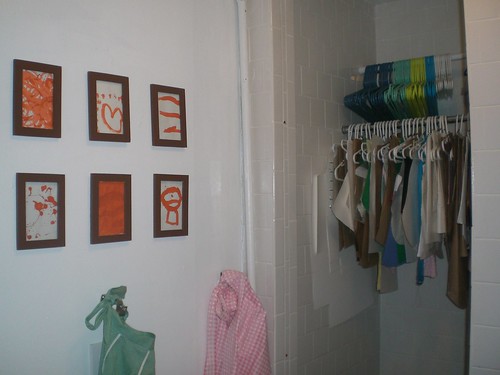
I have been storing my patterns in the shower for awhile now but this weekend I added a much needed second bar to store my extra hangers. This is so much better that then all tangled up in a plastic ice bin from target. That was always a fight and an eyesore. That shower rod was worth the 5 bucks!
Well there is one corner left in this room and I am not sure that I will show you that corner. It is not pretty but I will see what I can do! A little plumbing is in order if you know what I mean! Scared yet Don?
Monday, January 14, 2008
Studio Makeover: Ironing center
So right off my little studio I have a unused, none functioning Bathroom. I know it is crazy that a family of four only wants or needs one bathroom. Well maybe there are times when we need a second one but when it was working no one used the silly thing. Too many spider webs and camel-back crickets for any one but me to use. Well first the shower broke and then the toilet started leaking like mad so I let Modern June take over.

So for todays studio redo I am going to show you my new ironing station that I created out of some repurposed items just hanging around, literally hanging around.

My inspiration for this project came to me via this great craft room. I always look at this set of pictures from BHG when I need to give my space some love. I was originally thinking that I could hang some peg board down there to cover the eyesore window. But then I realized that the "prison like safety screen" was near enough to a peg board.I then found my self wandering the halls of Target later that day looking for something in the bathroom accessories isle (more on that tomorrow) and I saw this cool hanging shower rack you know the kind they hang from the shower head, I did not buy it but wanted to. Didn't know why I wanted it but I sure did.
So home I go and I see my own unused shower rack hanging in the broken shower. HMMM... I grabbed some cable ties and hung that bad boy up. Then I arranged my new spray starch, air fresher and hunted down my water spray bottle to get it all in one place. When in use the ironing board gets set up right there too. Everything I need to iron all day. And no more lost water bottle for me!
To add a bit of fun I made a little hoop from some of my favorite Michael Miller Laundry Day. You can not seem to be able to get this print any longer so I covet it endlessly! It was kinds hard to cut into this. This is one of my repro depot finds at Renegade last year. Remember this wonderful idea from Posie get cozy and The Purl Bee!Then I added a big fancy hook that is in tool caddy just begging to be used. Perfect for my sleeve iron. I never knew what to do with great thing.
Once I got all this done and I took some pictures and noticed how gross my ironing board cover is looking. They don't last long enough for me to buy them I just pin on a fun piece of cheap fabric. This is fabric from my best neighbor friend Janet. Janet was this from Jacks house or from your attic? I added this plate under the iron hoping I will be able to keep the new cover nice longer, the iron leaks when too full. I refuse to by a new one just because of a little leak!

I was feeling little silly taking so much time doing project. But I kept telling myself that I am worth it. I spent 12 hours a day down here at the end of the holiday season. Don works in a building that received a design award, granted it is cube-ville, I want a nice place to work too. I want it pretty and nice as well as organized. I have been in too many costume shops that were ugly as sin. NO charm or comfort. It will be worth it!I also want my wonderful things around me like vintage aprons and the kids art work. These are left over from the bathroom days of old. That was a fun day making those!

I think it might enjoy me some ironing soon!
Come back I have a long way to go on this sewing studio Make over! Please share your inspiration with me and the other groovy readers by leaving me a comment and a link to what gets you motivated to make all good!

Update I added a two 3m hooks so I could have snips and a ruler at easy access.
Check out Monica's Ironing Center, it puts mine to shame! That is the sad thing about NO COST remolding is is just not ever perfect! Monica's not that if Perfection! Thanks for sharing!