Showing posts with label tutorial. Show all posts

Wednesday, February 3, 2010

No-Sew Pillow for Valentines Day Flashback

Today I thought it would be fun to revisit a tutorial that I did in 2008,  "No Sew Pillows for Valentines Day." I was honored to do this tutorial on our local morning show, Virginia This Morning
The Tools: scissors, ruler, pencil and Heat Bond (No Sew)

Fabric: Use up some of those scraps, or buy a few Fat Quarters.

Pillows: Buy a few simple pillows at any old place that sells housewares. Or, better yet, grab one you already have and dress it up. Feeling adventurous and industrious? Make your own from scratch. I suggest using a pillow with a zipper and a pillow form inside. Working flat will be much easier.

Template: Free hand hearts are really fun. You can also print out a coloring page off the internet, or use a stencil from the craft store. My cute created concentric hearts for me with Adobe Illustrator. 

Step one: Iron your Heat Bond to the wrong side of the fabric and trace out your hearts. For the white pillow I will be using two different size hearts and layering them prior to applying them to the pillow.

Step Two: Using pinking shears or regular scissors cut out your iron on patches.

Step Three: Remove paper backing off the smaller heart and center it up onto the larger heart. A ruler is most helpful with placement.


Step Four: Find your center and mark with pins now use your clear ruler so center the 4 hearts with each of the 4 quarter of the pillow.  You can also measure the distance away from the out side edges to ensure your hearts are centered properly.


Step Five: Once you have these sweet hearts in just the right spot, iron as directed on heat bond packaging. Check your iron on patches to insure they are secure. A little extra pressing may be in order. When all are in place simply fill your newly decorated pillow back up with its pillow form and fluff. Now comes the easy part... enjoy!

Monday, January 25, 2010

Gift Envelope Tutorial


I posted this tutorial on the Modern June's blog yesterday, I thought you all would enjoy it too...

At Modern June, we offer free gift wrapping to all our customers. I just love taking the time to make a package pretty, special and reusable. I have a lot of pretty boxes and paper for just such occasions, but how can you get it to its destination, looking great without spending an arm and a leg on shipping? Enter my old assistant and friend Suzanne, from Silver Tree Art. She makes the most lovely, reusable, fabric gift bags from fabric scraps and trims. Having received several of these sweet gifts over the years, I soon realized that this was the perfect solution to gift giving and shipping!

I don't have a pattern, but I do have a method. To start with, I always use scrap fabric, usually oilcloth scraps, but cotton and paper would also be a fantastic alternative. Use what you have! If you like the look and sturdiness of the oilcloth, head on over to my other shop Oilcloth Addict for great selection.


Stuff you gotta have:
  • your gift 
  • sufficient fabric to createan  envelope and a flap. 
  • trim, ribbon, ric rac, or buttons to use as a closure
  • cutting tools
  • sewing machine


You would think that as a professional pattern maker I would do this more methodically...
no way! This is a down and dirty project. D and D all they way!
  Simply lay your gift down and eyeball a bit of extra space around it.


Add a 1/2 inch seam allowance (S/A) while trimming off extra.


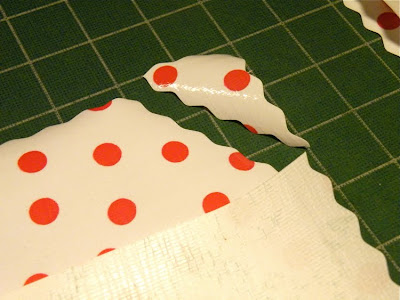
Angle cut your flap.


Flip your fabric so it's right sides out, match up your scallops and sew using a 1/2 SA.


Attach tie, in this case ric rac, leaving one end long enough to wrap around the back of the package once, then add 8 inches--the second tie will be an additional 8 inches.
Bar Tack your tie in place at the 8" mark.


This time I used red ric rac as a tie, but in the past I have sewn on a button and slit a hole to close up my envelopes. Either way, it's great fun and a good way to use up what's laying around.


Add your tags and load her up! I made a heart out of some oilcloth and used it as the tag. Just make a tiny slit and slip it on.

Wednesday, November 11, 2009


Check out how to make you own NO-SEW Fall table at my Oilcloth Addict Blog!


Wednesday, September 23, 2009

Halloween Tablecloths


Halloween Tablescape, originally uploaded by ModernJune.

Want to know how to make a small circular tablecloth? Check out my Oilcloth Addict blog for the 411. Want me to make one for you? Not a problem, Modern June custom makes oilcloth tablecloths in every shape and size! Either way your good to go!  Order now for Halloween!


Tuesday, August 25, 2009

Easy-Peasy Desk Dots!

Check out my Oilcloth Addict Blog for a fun and simple tut! All over the country kids big and small are back to school! So I thougth I would bring back Silver Tree Art's Chalk Dot tutorial and make them Desk Dots. I know my homeschooling posse will love using these. Have fun!

Wednesday, May 27, 2009

summer time at OCA


Hey guys,  I just wanted to let you all know that I am getting the summer kicked off with some fun and sun loving tutorials on my Oilcloth Addict bloggy-blog!   First project up is the long over due picnic basket tutorial from Ono's bridal shower!   I hope you like it, it sure was fun to make.  Hang around, there is more good stuff coming all summer long.  

Wednesday, November 5, 2008

OILCLOTH ADDICT News!


I ask you all to click on over and check out OILCLOTH ADDICT'S blog some time soon. I proudly announce our first tutorial by guest bloggers, Little Birdies Secrets, Not Your Mama's Gloves!

Thursday, October 16, 2008

look what I found...


I just found this great website Penelope Plans that linked to my pillow tutorial! Yah! So ladies and gentlemen, put on your thinking caps you could make a no sew pillow for every season! Think about it a Jack o Lantern pillow would be really fantastic on the couch about now!

Sunday, February 3, 2008

No Sew Pillows for Valentines Day

Watch for me on TV tomorrow (Monday morning, sometime between 9-10 AM), I will be making "No Sew Pillows for Valentines Day" on Richmond Channel 6 WTVR, on Virginia This Morning

The Show line-up for Monday, February 4th is:

  • Gadgets & Gizmos: www.technoscout.com
  • No Sew Pillows: www.modernjune.com
  • Chesterfield Children's Theatre: chesterfieldchildrenstheatre@hotmail.com
  • Amiri Baraka: www.vsu.edu


The Tools: scissors, ruler, pencil and Heat Bond (No Sew)


Fabric: Use up some of those scraps, or buy a few Fat Quarters.


Pillows: Buy a few simple pillows at any place that sells housewares. Or, better yet, grab one you already have and dress it up. Feeling adventurous and industrious? Make your own from scratch. I suggest using a pillow with a zipper and a pillow form inside. Working flat will be much easier.


Template: Free hand hearts are really fun. You can also print out a coloring page off the internet, or use a stencil from the craft store. Don created concentric hearts for me with Adobe Illustrator. I will post those later.

Step one: Iron your Heat Bond to the wrong side of the fabric and trace out your hearts. For the white pillow I will be using two different size hearts and layering them prior to applying them to the pillow.


Step Two: Using pinking shears or regular scissors cut out your iron on patches.


Step Three: Remove paper backing off the smaller heart and center it up onto the larger heart. A ruler is most helpful with placement.


Step Four: Find your center and mark with pins now use your clear ruler so center the 4 hearts with each of the 4 quarter of the pillow. You can also measure the distance away from the out side edges to ensure your hearts are centered properly.


Step Five: Once you have these sweet hearts in just the right spot, iron as directed on heat bond packaging. Check your iron on patches to insure they are secure. A little extra pressing may be in order. When all are in place simply fill your newly decorated pillow back up with its pillow form and fluff. Now comes the easy part... enjoy!